
Your guide to confidently choosing a tripod for nature photography
- Aug 25, 2025
- 8 min read
A tripod can open creative possibilities in nature photography. It doesn’t have to be about perfection though it is about choosing a companion that can enrich your photography today and continue to support you in the future, as your style and interests evolve.

In this guide, I share when a tripod can truly make a difference, when you might not need one and what to think about when choosing a tripod that suits you now and grows with your photography journey.
I know from experience that tripods can feel heavy, awkward or simply inconvenient at times. I’ve had plenty of what I call 'Tripod Moments' when I would wonder whether it was even worth the effort of using one. But over time, I discovered that the right tripod becomes less of a burden and more of a trusted partner in the field. Using one in the right scenarios helps me slow down, refine my compositions and create images that simply wouldn’t be possible otherwise.
If you’re wondering whether it’s time to invest in a tripod, choosing a tripod that works for you now and into the future is worth consideration. A tripod is something you can add to your gear collection when you feel ready – and when you know it will support the kind of photography you’re most drawn to or wanting to explore.

Why a tripod matters in nature photography?
Nature photography rewards patience. Whether you’re capturing an impressive landscape, experimenting with long exposures, photographing delicate fungi on a forest floor or framing a glittering night sky, a tripod helps you hold steady – both your camera and your approach.
Setting your camera on a tripod keeps it stable, but it also encourages you to pause, notice details and make more deliberate creative choices. It becomes a reminder to linger with nature rather than rush through it.
When a tripod makes all the difference
Whenever your photography calls for precision, a tripod can often make a meaningful difference. While you can sometimes use a rock, log or fence post as a substitute, those surfaces aren’t always available in your chosen location or even at the right angle or height for the composition you’re after.
Landscapes – waiting for the right light and carefully building a composition is much easier when your camera anchored in place.
Long exposures – when you need stability no hand can provide for silky waterfalls, river reflections, star trails and auroras. Even the strongest arms will have little chance of full maintaining complete stillness for long enough for really slow shutter speeds.
Low light – dawn, dusk, dense forests or cloudy days often call for slower shutter speeds where a tripod avoids unwanted blur.
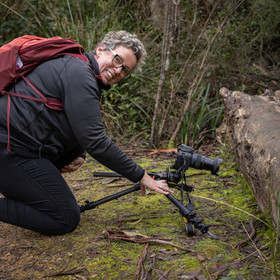
Macro and close-ups – photographing flowers, insects or fungi demands precision; even the tiniest movement can shift focus. A tripod also makes it easier to shoot close to the ground, especially if paired with a cable release and/or a tilted LCD screen.
Heavy gear – when the weight of your camera and lens makes it difficult to hold steady, a tripod shares the load.
Essentially, the slower your shutter speed, the more likely you’ll need a tripod.

When a tripod may not be as helpful
Not every situation calls for a tripod to be used. For instance, they are less practical when tracking moving subjects or when compositions need to change quickly – in such cases, a tripod can feel more like a hindrance than help.

When you need to travel light, avoid attention or in a tight space. There are times when you simply want to wander, observe and photograph with minimal weight or bulk. Or maybe you’re in a crowded location or a space too tight to set a tripod up.
When you're on a boat – because the tripod will move with the boat and if it's not held securely, it may accidentally fall into the water! Nobody wants this for their camera (that is, unless it's in an underwater housing to protect it).
Photographing birds and wildlife is often easier to do handheld. Even if your tripod is paired with a gimbal head, for fast-moving moments, using one is often more restrictive. Personally, I reach for a monopod instead when I need stability for a heavy telephoto lens. (That’s a topic for another post.)
When freedom of movement is desired. Consider scouting your chosen location for angles and compositions with your camera handheld first. Then once you’ve found a sweet spot, set the tripod up in that location to refine your shot.
In well-lit conditions you can already achieve a fast enough shutter speed handheld, so there’s no real need for the extra support with a tripod.
There’s no rush to add a tripod to your kit. You can always make use of alternatives, like rest your camera on a log, rock or backpack or lean against a fence post. Using image stabilisation on your camera or lens can also help, as does increasing your ISO in low light (although the latter comes with other compromises to consider).

Choosing a tripod that grows with you
If you’re ready to invest in a tripod, the key is choosing one that works for your needs today while also being versatile enough for tomorrow. Even if you’re not sure what genres you’ll explore in the future, selecting with longevity in mind means your tripod can adapt as you do.
Here are some things to consider when making your decision:
Height: Ideally, your camera should reach close to eye level without relying on the centre column fully extended. This makes shooting more comfortable and helps keep your setup stable. Avoid extending to maximum height unless you need to, as the lower leg sections are sturdier and less prone to vibration.
Stability and weight capacity: Make sure the tripod can comfortably support your heaviest camera and lens combination. Some tripods include a centre hook to add weight (like your camera bag) for extra stability in windy conditions.
Travel use and ease of setup: If you’ll be flying or hiking with it, weight and folded size matter. More leg sections fold down smaller for travel but take longer to set up and may compromise maximum stability.
Leg angles: Some tripods allow the legs to be set at wider stances, letting you work lower to the ground or create a more stable base on uneven or soft terrain. This is especially useful for macro photography, in windy conditions or on rocky surfaces.
Centre column: A centre post can give you extra height and versatility, and on some tripods it can even be positioned horizontally for creative angles such as macro or overhead shots. The trade-off is that when fully extended vertically, stability is reduced. Tripods without a centre column are sturdier overall and make it easier to work close to the ground.
Tripod head: A ball head is simple and flexible, pan-tilt heads suit slow, deliberate landscape work and gimbals are designed for long telephoto lenses and wildlife. Whatever type you choose, make sure it can securely support the weight of your setup, as some heads may still creep or slip under load. This can be frustrating at first, but once you know what to look for, it’s easy to test in-store by attaching your own camera and checking how firmly the mechanism locks in place. Hint: while some tripods are sold with a tripods head, not all are - be sure, especially if purchasing a tripod online, that it does come with the tripod head of your choosing.
Locks and adjusters: There are two main mechanisms — twist locks and clip locks — each with their pros and cons. While I can share which I prefer, what matters most is choosing whichever feels easiest and most comfortable for your hands. If you’d like to dive deeper, a quick search (‘tripod clip locks vs twist locks’) will give you a range of perspectives.
Materials:
Carbon fibre – light and strong. Ideal for travel and cold climates as it’s less cold to the touch, though higher in cost.
Aluminium – heavier and colder in winter, but more affordable and very reliable. Many aluminium tripods include foam grips to make them more comfortable to carry in the cold.
Whenever possible, try before you buy. Attach your own camera in-store to see how it balances and whether the tripod feels like something you’d be happy to carry on your nature walks.
The best tripod is the one you’ll use – one that balances comfort, practicality and cost,
while giving you confidence it will grow with your photography.
An inexpensive tripod can be useful at first, but many photographers find that cheaper models feel limiting over time. A well-made tripod is an investment that will last for decades. Unlike camera bodies, tripods don’t quickly become outdated – a sturdy one today will still be sturdy in 20 years.
If you’re serious about landscapes, night photography or long exposures, the right tripod is worth prioritising early. It’s one of those pieces of equipment that quietly supports you through your entire journey.

Getting the most from your tripod
Even with a tripod, you might sometimes notice a little blur creeping into your photos. Don’t worry – it happens to everyone, it doesn’t mean you’re doing anything wrong. Often, it’s just a matter of making a few small adjustments that can make a big difference – here are a few thoughts:
Tripod too light for the weight of your camera and lens: extend only the sturdier upper leg sections and keep the tripod lower if possible. Many tripods have a centre hook – try hanging your camera bag from it to add stability, especially in windy conditions.
Pressing the shutter: even the lightest touch can introduce a small shake. Using a two-second timer, a cable release or a remote shutter gives your camera the chance to settle before the exposure.
Wind and loose straps: gusts of wind or dangling straps can cause subtle movement. Shield your tripod with your body, tuck away any straps or find a sheltered spot. Sandy ground can also help absorb vibrations.
Sinking legs: on soft ground such as sand, mud or damp soil, tripod legs can slowly sink without you noticing. Even a slight shift can affect sharpness or composition. To minimise this, press the legs firmly into place, use wider feet or spikes if your tripod has them, or keep an eye on the setup between shots.
Focus issues: sometimes it’s not shake but focus that causes soft images. In low light or night photography, use Live View and magnify on a bright star or high-contrast area to check your focus carefully and avoid touching the focus ring once it’s set.
With a little awareness, your tripod becomes not just a stand for your camera but a reliable partner – one that helps you create sharp, intentional images with confidence.
•◊•◊•◊•◊•◊•◊•
Do you have a tripod story to share? Perhaps you have an amusing story or maybe an anecdote about a time you didn't have a tripod and wished you did. We'd love to hear your insights ... your reflections could very well help others make a better choice when choosing the right tripod for them.
•◊•◊•◊•◊•◊•◊•
When you join a Shutterbug Walkabouts experience, if the genre of photography you'll be focusing on calls for it, we may suggest you bring a tripod if you have one. If you don't have one, you can borrow one of our loan tripods at no additional charge. It's a simple way to experiment, learn and decide what type of tripod you might buy - or to travel light when dealing with luggage limits on flights to Tasmania.


Comments